


כלי מיסוך ודיוטת אנונימיזציה
אם הכלי האוטומטי אינו מתאים לך, אתה יכול להשתמש במצב ידני.
כל הכלים לטשטוש תמונה מקוונת
כיצד לטשטש תמונה בקלות ובחינם תוך מספר שניות ? כיצד לאנונימיות תמונה, להסתיר פנים, מבלי לקרוא לתוכנה מסובכת לעיבוד תמונה מסוג פוטושופ ?
אם לא נוח לך עם הרעיון שפרצוף או מידע רגיש מופיעים על תמונה, אתה יכול לטשטש אותם תחילה. במאמר זה נראה כיצד לעשות זאת באופן מקוון בקלות רבה באמצעות מחשב שולחני, טלפון נייד או טאבלט.
להלן כלי ריטוש של התמונות שלך, קל מאוד לשימוש, מה שיאפשר לך לטשטש פנים בתמונה או לטשטש רקע צילום בפחות זמן ממה שאתה צריך לכתוב את זה.
תוכן
הכלים המקוונים הטובים ביותר לטשטוש תמונה בחינם
רשימה עדכנה כלים פשוטים מאוד לטשטוש פרצופים על תמונה שצולמה בבית הספר או במהלך טיול בבית הספר למשל. ניתן להשתמש בכלים אלה גם כדי לטשטש אזור בתמונה או במסך מסך. כדי להחליק בין הכלים המקוונים שלך לניהול ושיפור התמונות שלך.
מאוחד. אידיאלי לטשטש אדם בתצלום
אחרון מכלים מקוונים שפשוט מסתירים פנים אחד או יותר בתמונה, מפוצץ אינו דורש הרשמה או התקנת דבר. אתה מעלה את התמונה שלך באתר, אתה בוחר על ידי ציור אותה על המסך עם העכבר שלך את האזור שברצונך לטשטש וואלה. אתה יכול להשחיר, לטשטש או לפקסס את המסכה. אז אתה רק צריך להוריד את התמונה המטושטשת בלחיצה. פשוט, בחינם וללא שום פרסום.
קישור: מאוחד
ImageBlurur. טשטוש גאוסי אמנותי כדי להסתיר חלק מתמונה או לטשטש רקע

להלן כלי מקוון נוסף המאפשר לטשטש תמונה ולהפוך שם כל מידע רגיש. ImageBlurur הוא הכלי המדהים לביצוע משימה זו במהירות ופשוט. לטשטש תמונה, ImageBlurur מציע לך לגרור את האלמנט בחלון המסופק למטרה זו. ואז בחר את האזור לטשטוש ואז לחץ על כפתור “טשטוש It” כדי לאמת את השינוי. זה ייצר סוג של מעורפלות גאוסית או פיקסלג ‘מוגזם שיהפוך את האזור שנבחר לבלתי קריא. לחץ על כפתור “המשך” ותוכל להוריד את התמונה שהשתנה.
קישור: ImageBlurur
FacePixelizer. מגלה אוטומטית את הפנים לטשטוש
![]()
מה זה FacePixelizer? FacePixelizer מספקת כלי תוכנה למסכה ואנונימיות תמונות. אתה יכול לטשטש פנים על תמונה בכמה לחיצות. FacePixelizer עובד ישירות מדפדפן האינטרנט שלך, כך שהתמונות שלך נשמרות פרטיות. אין הילוכים על ידי רשתות – הכל נמצא במיקום. FacePixelizer מבוסס על אותו עיקרון כמו שני חבריו הקטנים. המו”ל שלה מגלה אוטומטית פנים ומציע לך לטשטש אותה אך אתה יכול לשקף כרצונך את האזור שתרצה להסתיר. אידיאלי אם אין לך תוכנת עריכת תמונות. הממשק המקוון קל במיוחד לטיפול בו ויעזור לך להסתיר נתונים מסוימים מהתמונות שלך.קישור : FacePixelizer
Redactphoto. צור טשטוש פיקסל על תמונה
זה גם אחד הכלים הפשוטים והמהירים ביותר. Redact-Photo עובד במהירות האור ישירות בדפדפן שלך. אתה זורק את התמונה שאתה רוצה לטשטש לדף. לאחר מכן אתה מגדיר את האזור לטשטוש או שאתה רוצה להשיג את המסכה. האתר מציג את התוצאה מייד עם מטמון פיקסל של האפקט הטוב ביותר. אתה יכול להסתיר חלק אחד או יותר מהתמונה. לחיצה ותקבל את התמונה החדשה שלך.
קישור : פוטו מחדש
PIXLR. טשטש תמונה בנייד
איך לטשטש תמונה באייפון ? כיצד לטשטש תצלום אנדרואיד ? Pixlr הוא אולי הפיתרון הפשוט ביותר. שיבוט פוטושופ זה מציע יישומים ניידים ייעודיים עבור iOS ו- Android. בגרסה ניידת זו, זה פשוט מאוד לפקס חלק מתמונה. בחר בפונקציה “פיקסליזציה” מהמברשת בתחתית המסך. לאחר שנבחר הכלי, החלק את האצבע על החלק שאתה רוצה לטשטש. אמת אז שמור את התמונה. זהו זה.
חיבורים: Pixlr באנדרואיד – Pixlr ב- iOS
כל כך הרבה עבור חמשת הכלים המקוונים האלה שנוצרו במיוחד כדי לטשטש תמונות. אבל אתה יכול גם לקרוא ליישומי ריטוש או עריכת תמונות גדולים. תוכנת קנבה, צבע ופוטושופ מאפשרת תמונה של תמונה בכמה לחיצות. להלן הצעדים לעקוב.
- עבור קנבה. פשוט בחר את התמונה, לחץ על סנן ואז על אפשרויות מתקדמות. החלק את הסמן ימינה לטשטוש, ומשמאל כדי להדגיש את המיקוד.
- לפוטושופ, אני מגה את התמונה הרצויה מ”קובץ “ו”פתוח”. בכלים המוצעים בצד שמאל, השתמש בלסו המנוקד, השני מתחיל מלמעלה.
- על צבע לבסוף, ברגע שקובץ התמונה שלך היה פתוח, בחר את החלק של התמונה שברצונך לטשטש ואז התקשר לכלי “שינוי גודל” והחלף את איור 100 של התיבות האופקיות והאנכיות המוצגות על ידי ערך קטן יותר, כמו 10 לדוגמה.
ואת ? האם אתה מכיר או משתמש בכלים או שירותים פשוטים אחרים כדי לטשטש תמונה או תמונה ? תודה ששיתפתם איתנו באמצעות התגובות.
כדי לקבל את ההשפעה ההפוכה ולשפר את איכות התמונות הדיגיטליות, תוכלו להתייעץ עם רשימת כלי צילום אחרת זו.
מיסוך ואנונימיזציה של כלי הדרכה וידאו
טשטוש, פיקסל או צנזר בקלות אזורים פרטיים של התמונות והמסמכים שלך!
מה זה FacePixelizer?
FacePixelizer הוא עורך תמונות המתמחה במיסוך ואנונימיזציה של תמונות. השתמש ב- FacePixelizer כדי להסתיר במהירות מידע על תמונה שאתה לא רוצה לפרסם. לדוגמה, אתה יכול לטשטש טקסט או אפילו להעביר פנים על אחת התמונות שלך.
מכיוון ש- FacePixelizer פועל בדפדפן, התמונות שלך נשארות פרטיות ולעולם לא עוזבות את הדפדפן שלך. שום דבר לא נשלח לרשת, הכל קורה בדפדפן שלך.
למי זה הכלי הזה?
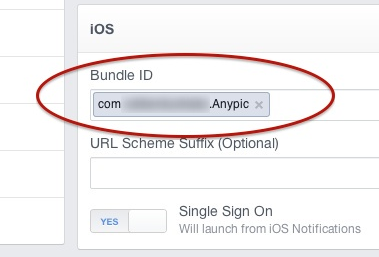
- מחברי הדרכה שרוצים להסתיר את הדוא”ל שלהם או כתובות אחרות במסך מסך.
- בלוגרים המבקשים להשתמש בתמונות אישיות בבלוגים שלהם.
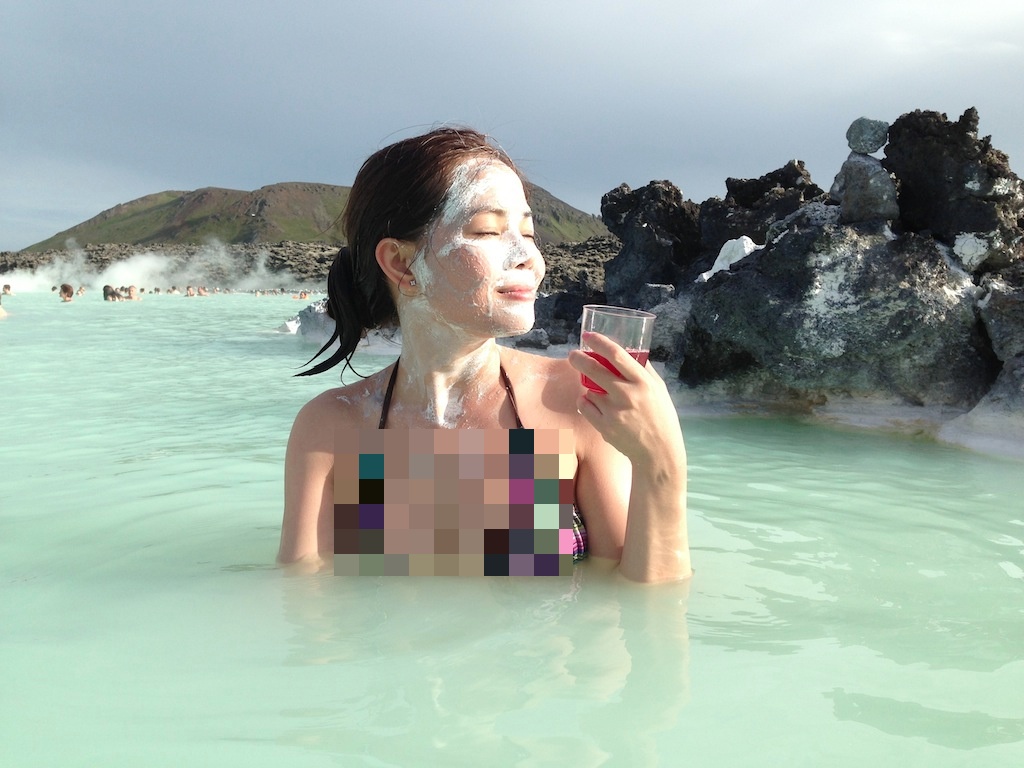
- צלמים המבקשים לטשטש אדם שיכבד את דמותם נכון.
- עיתונאים המבקשים להגן על זהותם של אנשים בתמונה.
- משתמשי פייסבוק לא רוצים שיפטרו בגלל פרסום תמונות.
- הורים המבקשים להסתיר את פניהם של ילדיהם בתמונותיהם.
- אנשים המבקשים לטשטש אלמנטים פרטיים במסמך תומך, כמו הצהרת בנק או חשבונית.
- אנשים המבקשים להסתיר את לוחיות הרישוי שלהם בעת הצבת רכב למכירה באתר מודעות מסווגות.
איך להשתמש בזה? 
קלי קלות!
- החלק תמונה (.JPG או .PNG) בדף האינטרנט FacePixelizer.
- בצע מבחר בכל אזור בתמונה שברצונך לטשטש או לפיקסיה.
- שמור את התמונה שלך.
מהירות ופרודוקטיביות
FacePixelizer מותאם לפריון מקסימלי כדי לטשטש את התמונות שלך עם כמה שפחות לחיצות.
FacePixelizer דורש רק לחיצה על ידי טשטוש. השווה את זה לחמישה הקליקים הדרושים או יותר בפוטושופ כדי לבצע את אותה המניפולציה! שלא כמו מפרסמים אחרים, אין צורך לבצע בחירה לפני יישום אפקט, זה חל ישירות. היעילות של FacePixelier טמונה גם בעובדה שאין צורך להתאים התאמות לפני יישום השפעה. עם המצב האוטומטי שלה, הפנים את העובדה בצורה מושכלת עבורך.
איתור פרצופים אוטומטיים 
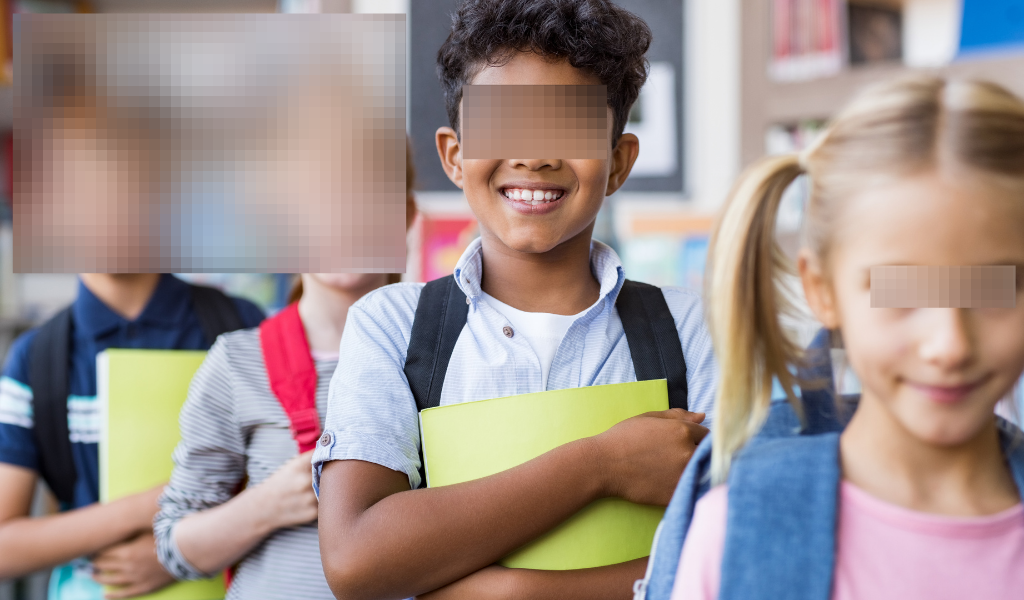
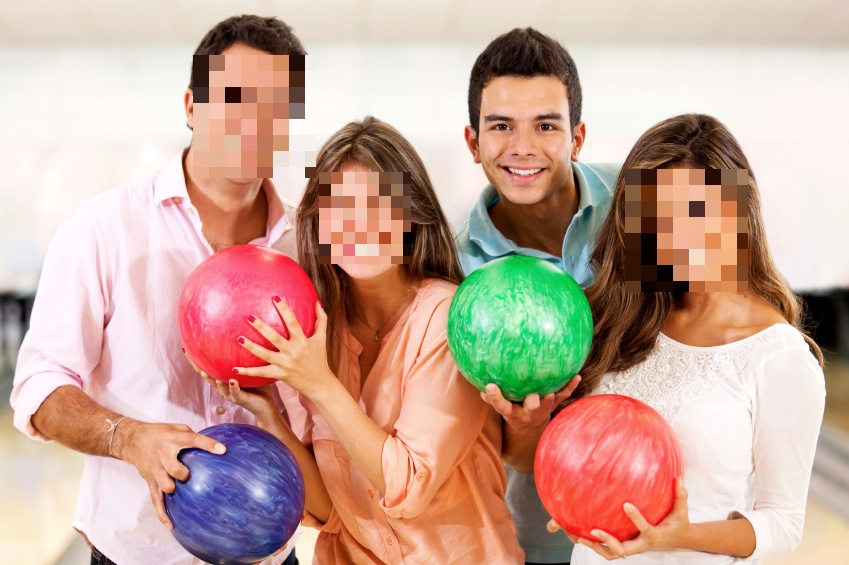
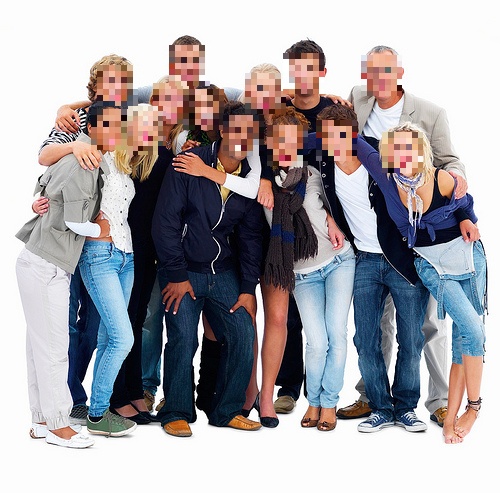
FacePixelizer כולל גילוי פרצופים אוטומטיים.
מודול הגילוי פועל בדפדפן שלך ועובד די טוב, אולם יתכן שהוא לא יגלה פרצופים מסוימים. לדוגמה, פנים פרופיל או מכוונות למעלה או למטה. מצד שני, קל מאוד לזהות ולרטש מחדש את הפנים הללו באופן ידני עם הכלי האנונימיזציה.
יש לך את הבחירה לפקס או לטשטש את הפנים.
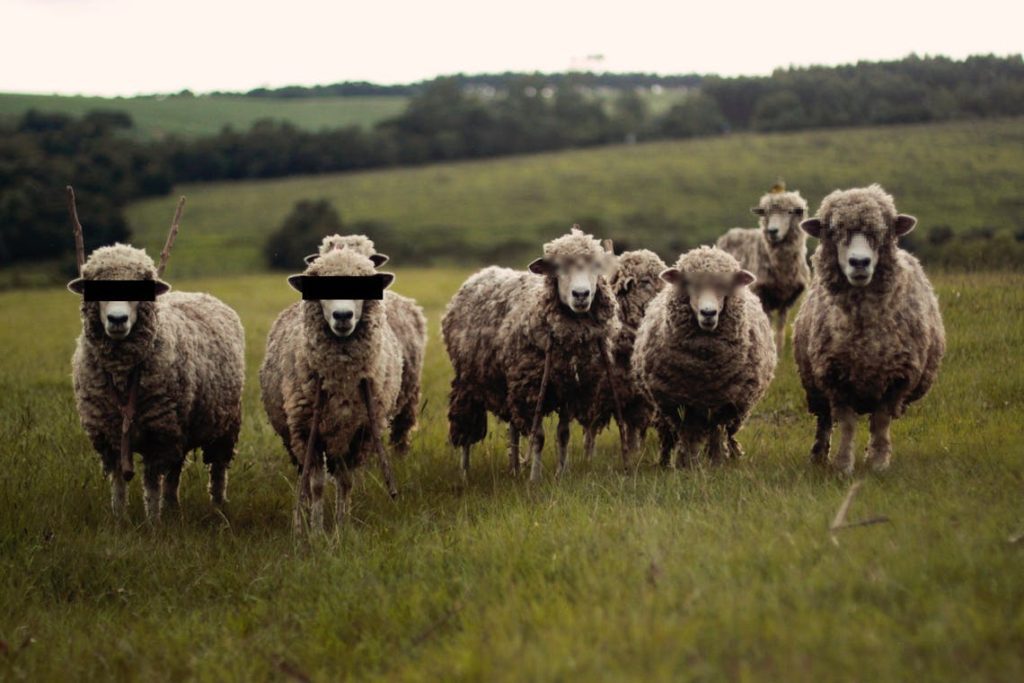
גילוי אוטומטי יכול להיות שימושי מאוד כאשר יש הרבה פרצופים על תמונה, כמו בדוגמה הבאה.
כלי מיסוך 
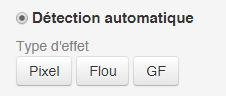
לכלי המיסוך שני מצבים: אוטומטי ומדריך.

מצב אוטומטי – איתור אוטומטי של פרצופים וטקסטים 
מצב אוטומטי הוא אינטליגנטי ויכול לאתר את ההבדל בין טקסט לפנים. הפרצופים מפושטים והטקסטים מטושטשים. עוצמת הטשטוש או הפיקסליזציה תלויה בגודל האזור שנבחר. אם האזור רחב, האפקט יוגדר אוטומטית. במילים אחרות, ההשפעה מתאימה לפי האזור שנבחר.
עבור הטקסטים, אפקט הטשטוש הוא פרופורציונלי לגודל הגופן, כך שגופנים גדולים מטושטשים יותר מגופנים קטנים. כתוצאה מכך, עוצמת הטשטוש נותרה עקבית ללא קשר לגודל גופני הכתיבה על אותה תמונה, ובכך נמנעת מכם שתצטרכו להתאים ידנית את ההגדרות לכל גדלים של כתיבה.
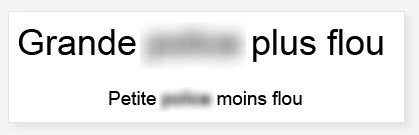
הדבר נכון גם לפיקסל של פרצופים – עוצמת ההשפעה פרופורציונלית לאזור שנבחר. פנים גבוהות יהיו יותר פיקסליות מאשר פנים קטנות.

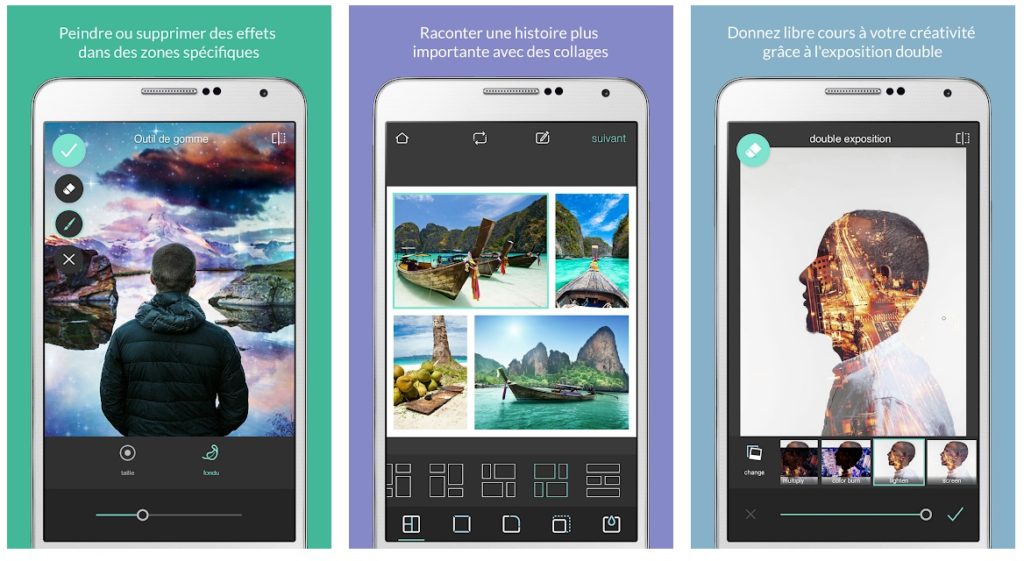
מצב ידני – בחירה ידנית של אזורי מיסוך 
אם הכלי האוטומטי אינו מתאים לך, אתה יכול להשתמש במצב ידני.
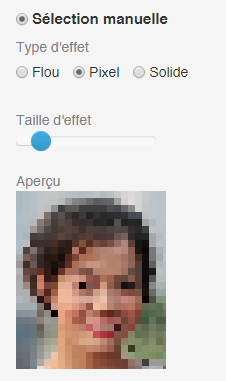
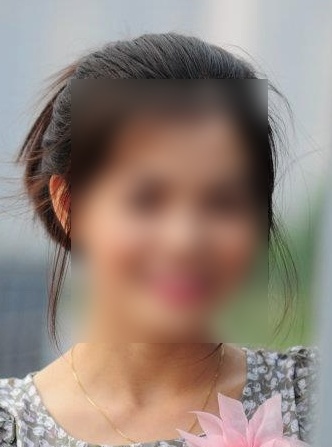
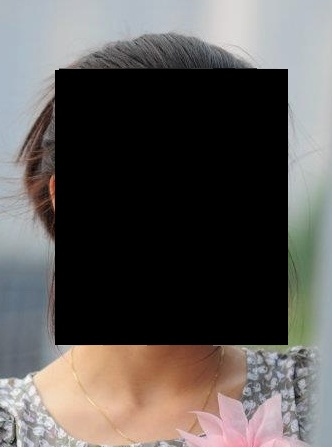
במצב ידני, אתה יכול לבחור בין אפקט פיקסיילינג, טשטוש או מוצק (מלבן שחור). השתמש בהגדרות כדי לשנות את עוצמת האפקט. התמונות הבאות מראות לך סקירה כללית של האפקטים השונים.
![]()
מחק אפקט 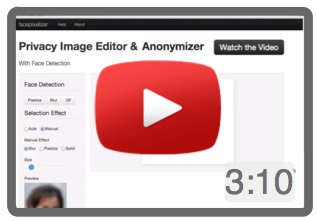
כדי למחוק אפקט, פשוט בחר את האזור המדובר החל מלמטה לימין ועלה שמאלה, כלומר הכיוון ההפוך של יישום האפקטים. תכונה זו שימושית מאוד וקלה לשימוש ברגע שההרגל. לדוגמה חזותית, עיין במדריך הווידיאו.

ניתן להשתמש במחיקת אפקט למטרות יצירתיות מעניינות, כמו למשל לחשוף אזור מסוים. בתמונה למטה, התמונה כולה הייתה פיקסל, ואז מחיקת האפקט הוחלה על אזור העיניים.

להציל 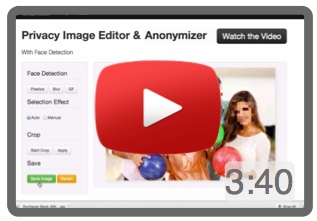
ברגע שאתה מרוצה מהתמונה שלך, לחץ על “שמור” והתמונה שלך תישמר בתוסף “מצונזר” שנוסף לשם הקובץ. לדוגמה, אם הקובץ שלך נקרא צילום מסך.JPG, לאחר שנשמר זה ייקרא CaptureDecran_censored.JPG.
![]()
לחץ על מאמרים על FacePixelizer


תשובות שאלות
FacePixelizer האם זה בחינם?
כן, FacePixelizer הוא כלי בחינם לחלוטין לשימוש. אם תפרסם תמונה שנערכה על ידי FacePixelizer באינטרנט, היינו אסירי תודה להוסיף קישור לדף זה (http: // www.FacePixelizer.com/fr/) ולהעביר את המילה!
ל- FacePixelizer יש יישום iPhone או Android?
הוסף את שמך לניוזלטר שלנו ואנחנו נודיע לך על זה יהיה מוכן!
מהם נתוני EXIF?
תמונות JPG עשויות להכיל נתוני EXIF שהם מידע הנוגע למועד ומקום בו צולמה התמונה, ומידע אחר כמו המצלמה המשמשת, המטרה, זמן החשיפה, זמן החשיפה, זמן החשיפה, זמן החשיפה, וכו..
לתמונות PNG אין נתוני EXIF.
נתוני EXIF נמחקים על ידי FacePixelizer?
כן, כשאתה שומר תמונה עם FacePixelizer, כל נתוני EXIF נמחקים.
מידע הנוגע לתאריך או למיקום הירי נמחק.
זכויות יוצרים 2013-2015 מעבדות ברווז גומי בע”מ.