


כונן Google לשולחן העבודה מגיע להחליף את הגיבוי והסנכרון, שהחליף את Google Drive
כדי להקל על המשימה שלך, Ubackit תומך גם בפונקציית גיבוי אוטומטית שתוכל לגשת אליו מראש היישום. פשוט לחץ על האפשרות “הגדר גיבוי אוטומטי” והגדר לוח שנה לבחירתך (יומי, שבועי או חודשי).
גלה את השירות שמתאים לך ביותר: גיבוי וסנכרון לעומת זרם קבצי כונן Google
זו אחת השאלות הרבות שפגשתי לאחרונה על זרם קבצי גיבוי וסנכרון וזרם כונן Google. מכיוון ששני השירותים מוצעים על ידי גוגל ונראים די דומים ממבט ראשון, אנשים רבים מבולבלים ביחס ליישומים שלהם. אל תדאג – במאמר זה אני אספק לך השוואה מפורטת בין גיבוי לסנכרון לבין זרם Google Drive ואני אסביר כיצד להשתמש בהם כמקצוען.
- חלק 1: מה הם שירותי גיבוי וסנכרון ושירותי זרם קבצים של Google Drive ?
- חלק 2: גיבוי וסנכרון לעומת זרם קבצי כונן גוגל: השוואה מפורטת
- חלק 3: כיצד לסנכרן את הקבצים שלך באמצעות גיבוי וסנכרון מגוגל ?
- חלק 4: כיצד לשמור את הקבצים שלך באמצעות זרם קבצי Google Drive ?
- חלק 5: כיצד לשמור קבצים ותיקיות עם WonderShare ubackit ?
מהם שירותי הגיבוי והסנכרון והשירותים של זרם קבצי Google Drive ?
לפני שנתחיל את ההשוואה שלנו בין גיבוי לזרם קבצים של גוגל כונן Google, אנו נכיר במהירות את היסודות של שירותים אלה.
גיבוי גוגל וסנכרון
באופן אידיאלי, Google ו- Sync Backup הוא יישום Office המאפשר לך לסנכרן את הנתונים שלך באמצעות Google Drive ו- Google תמונות. אתה יכול לבחור את התיקיות שברצונך לשמור והעתק השני שלהם יישמר בחשבון Google Drive שלך. מכיוון שהקבצים שלך יועתקו, אתה יכול גם לגשת אליו במצב לא מקוון במערכת שלך.
זרם קבצי כונן Google
קח בחשבון את מערכת הקבצים של גוגל כיחידת אחסון מורחבת (כגון כונן קשיח חיצוני) בה הקבצים שלך נשמרים. לאחר התקנת מערכת הקבצים של גוגל, תקבל את סמל הקורא הייעודי שלה במחשב שלך. כעת תוכל להשתמש בהם כדי לאחסן את הנתונים שלך ישירות בכונן Google (ולא באחסון המחשב שלך).
גיבוי וסנכרון לעומת זרם קבצי כונן גוגל: השוואה מפורטת
עכשיו כשאתה מכיר את היסודות, בואו נקבע השוואה בין -מעין של זרם קבצי כונן Google לעומת גיבוי וסנכרון.
גיבוי גוגל וסנכרון
זרם קבצי כונן Google
משמש לסנכרון נתונים בין המחשב שלך לקורא
משמש כאחסון משני כדי להקליט נתונים ישירות בכונן
הנתונים מאוחסנים ב
ראשוני במחשב (ומסונכרן בענן)
הנתונים מאוחסנים ישירות על הקורא
סנכרן קבצים בין מכשירים שונים ושיפור הזמינות שלהם
כדי לשחרר שטח דיסק במחשב ולשמור על הנתונים בענן בענן
יצרוך שטח ב- Google Drive
יכול לסנכרן תיקיות נבחרות
יכול לסנכרן קבצים בודדים
יכול להשתמש ביישומים ילידים
בדוק את הגישה בזמן אמת (משתמשים אחרים)
שילוב עם Outlook, Meet וכו ‘.
סנכרון קבצים אחרים (כגון המשרד)
שירותי חשבון אישי של גוגל
מקושר לתמונות Google
עסקים (או עסקים)
תיקון מחיר
חינם (15 ג’יגה -בייט), 15 $ לחודש (100 ג’יגה -בייט), 23 $ לחודש (200 ג’יגה -בייט) או 79 $ לחודש (2 TB)
6 $ לחודש (START -UP חבילה), 12 $ לחודש (חבילה סטנדרטית) או 18 $ לחודש (חבילה פלוס)
פְּסַק דִין
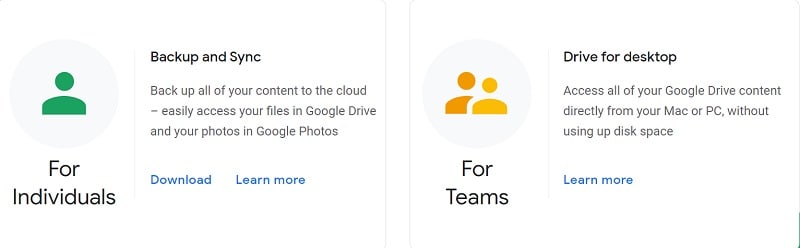
כפי שאתה יכול לראות בהשוואה שלנו בין זרם קבצי Google Drive לגיבוי וסנכרון, לשני הכלים יש יעדים שונים. אם אתה משתמש אישי ורוצה לסנכרן את הנתונים שלך בכונן, אתה יכול להשתמש בגיבוי וסנכרון מגוגל. עם זאת, לזרם קבצי Google Drive בהחלט יש תכונות מתקדמות יותר והוא יפעל כיחידת אחסון מורחבת המומלצת למקצוענים.
כיצד לסנכרן את הקבצים שלך באמצעות גיבוי וסנכרון מגוגל ?
עכשיו אתה אמור להיות מסוגל לבחור את האפשרות המועדפת עליך לאחר שנסעת בהשוואה זו בין Google Backup ו- Sync וזרימת קבצים. אם אתה משתמש אישי, גיבוי וסנכרון של גוגל יהיו פיתרון אידיאלי לשמירת הנתונים שלך או לגשת אליהם במספר מכשירים. כדי להתחיל להשתמש בגיבוי וסנכרון של גוגל, פשוט עקוב אחר הצעדים הבאים:
שלב 1: התקן גיבוי וסנכרן והגדר את חשבונך
ראשית, אתה יכול פשוט ללכת לאתר הגיבוי והסנכרון הרשמי של גוגל ולהתקין את היישום במחשב האישי שלך או ב- Mac. לאחר התקנת היישום, הפעל אותה והתחבר לחשבון Google שלך על ידי הזנת מידע זיהוי מתאים.
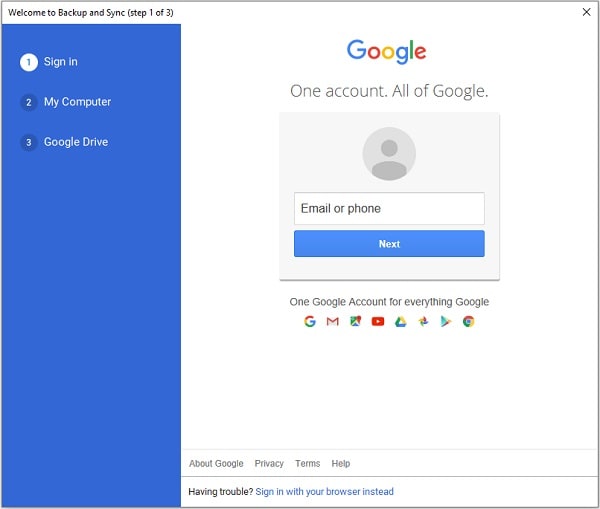
לפני כן, וודא שיש לך מספיק שטח פנוי בחשבון Google שלך, אחרת אתה יכול לקנות שטח אחסון נוסף.
שלב 2: בחר את התיקיות שישמרו או סנכרן עם Google Drive
לאחר מחובר לחשבונך, אתה יכול לבחור את התיקיות שברצונך לסנכרן עם Google Drive. אתה יכול לבדוק כמה מהקבצים המשמשים לעיתים קרובות כאן או ללחוץ על כפתור “בחירת תיקיה” לכיסוי ולבחור את התיקיות לבחירתך.
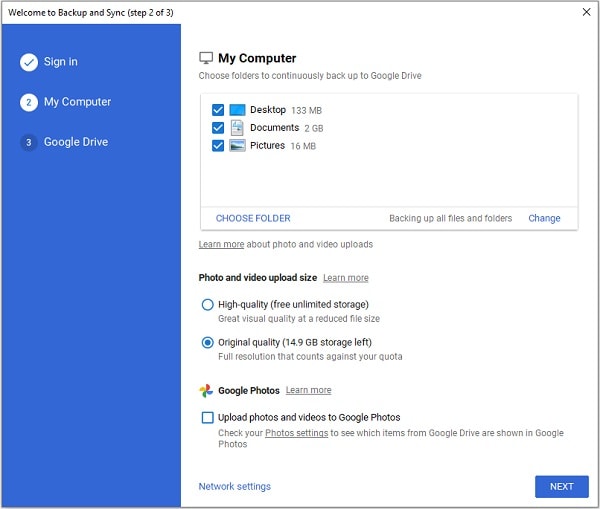
אז אתה יכול גם לבחור את האיכות בה ברצונך לאחסן את התמונה שלך ב- Google Photos.
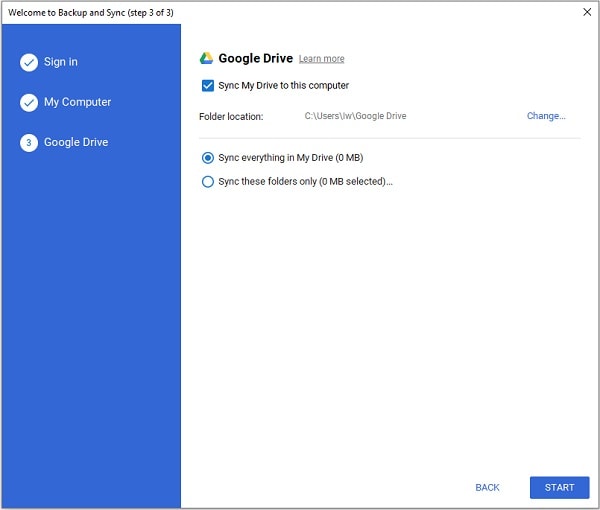
שלב 3: סיכום הנתונים שלך בהצלחה
זה הכל ! לאחר שבחרת את התיקיות, תוכל לבחור לסנכרן את כל הדיסק או את הנתונים לבחירתך. לאחר קביעת התצורה של ההעדפות הרלוונטיות, לחץ על כפתור “התחל” כך שגוגל תסנכרן את הנתונים שלך עם הקורא.
כיצד לשמור קבצים באמצעות זרם קבצי Google Drive ?
סביר מאוד שאחרי שנסעת בהשוואה שלנו בין זרם קבצי כונן Google לגיבוי וסנכרון, אתה בוחר בזרם קבצי Google Drive. מכיוון שהוא משמש כיחידת אחסון חיצונית, השימוש בזרם קבצים הוא פשוט ביותר. כדי לשמור את הנתונים שלך בזרם קבצי כונן Google, פשוט עקוב אחר ההוראות הבאות.
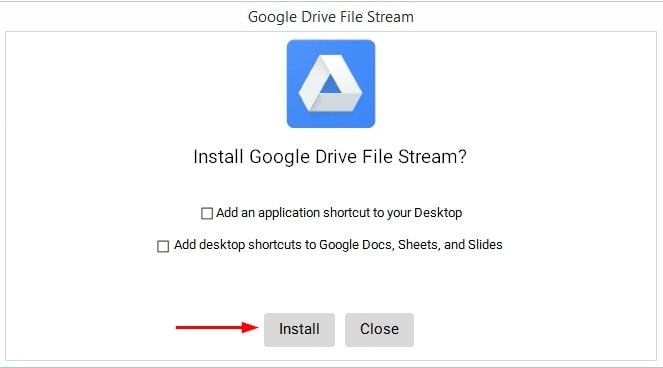
שלב 1: התקן זרם קבצי כונן Google במחשב שלך
כדי להתחיל, אתה יכול פשוט ללכת לאתר הרשמי של זרם קבצי Google Drive ולהתקין את היישום במחשב שלך. במהלך ההתקנה, באפשרותך להגדיר העדפות כדי להפוך את הקורא לזמין במערכת שלך.
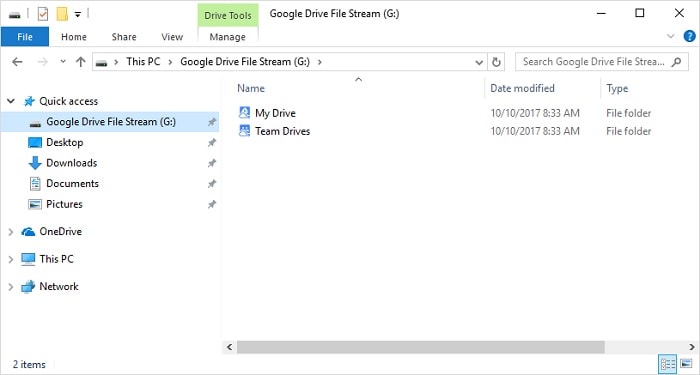
שלב 2: גש לזרם קבצי הכונן של Google
לאחר שהתקנת את היישום, תוכל לראות את סמל הייעוד לקבצי Google Drive Stream Stream Stream in the Explorer (או ב- Finder). כדי לגשת אליו, פשוט עבור לקורא והעתק והדבק את הנתונים שלך.
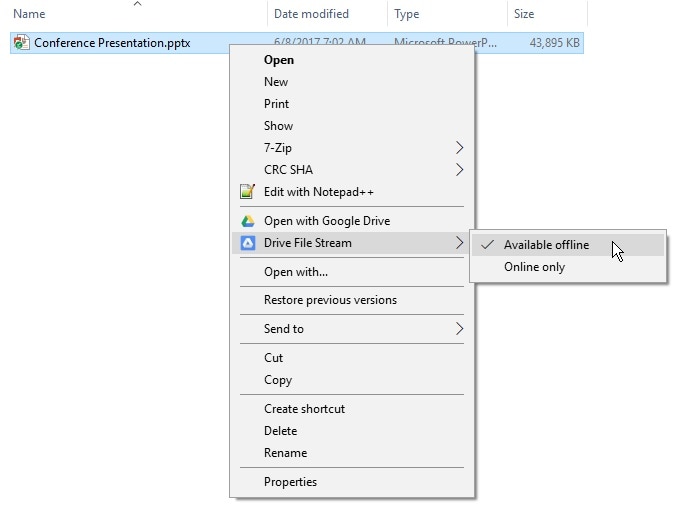
שלב 3: הפוך את הקבצים הזמינים לא מקוונים (אופציונליים)
באופן אידיאלי, אתה יכול לאחסן כל דבר בזרם קבצי כונן Google והוא יורד אוטומטית מ- Google Drive. אם תרצה, תוכל ללחוץ על לחץ על הקובץ ובחר כדי להפוך אותו לזמין גם במצב לא מקוון. לפיכך תשמור עותק שני של הנתונים שלך במחשב שלך, אחרת הם יהיו זמינים רק בכונן.
כיצד לשמור קבצים ותיקיות עם WonderShare ubackit ?
למרות שגיבוי וסנכרון מגוגל מציע פיתרון פשוט לאחסון הנתונים שלנו בכונן, זה יכול להיות די יקר ושטח האחסון שלו מוגבל. לכן, אם אתם מחפשים אלטרנטיבה לגיבוי וסנכרון של גוגל, תוכלו לנסות את הפתרונות הבאים WonderShare Ubackit. יישום משרד מקצועי, זה יכול לעזור לך לשמור את הנתונים שלך בכל מדיום אחסון ולשחזר אותם בהמשך.
- אתה יכול לשמור את כל הדיסק, כל ציון, או לבחור את הקבצים/תיקיות לבחירתך.
- יש אפשרות להגדיר גיבוי אוטומטי באמצעות Ubackit על בסיס התכנון המועדף (כגון יומי, שבועי, חודשי או רציף).
- מכיוון שאובביט לוקח גיבוי מצטבר, הוא יחסוך אחסון כולל של כ 80 %.
- ישנם טונות של פילטרים המשולבים ב- Ubackit כדי לבחור קבצים ספציפיים לשמירה. בנוסף, הוא תומך בכל סוגי הנתונים העיקריים המאוחסנים במחשב שלך.
- הוא מציע טונות של תכונות אחרות כמו גילוי מתקדם של וירוסים, התראות גיבוי וניהול אחסון.
אתה יכול גם לעזור לעצמך מ- Wondershare Ubackit, שהיא האלטרנטיבה הטובה ביותר לגיבוי וסנכרון מגוגל עבור Windows.
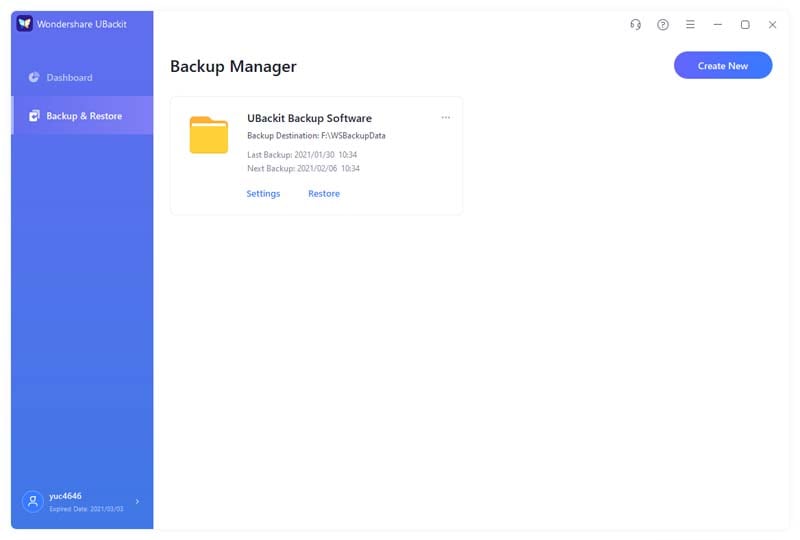
שלב 1: הפעל את Wondershare ubackit במחשב שלך.
ראשית, פשוט התקן והשיק Wondershare Ubackit במחשב שלך ועבור לקטע “גיבוי וקייטרינג” בסרגל הצדדי. משם, אתה יכול פשוט לבחור ליצור גיבוי חדש.
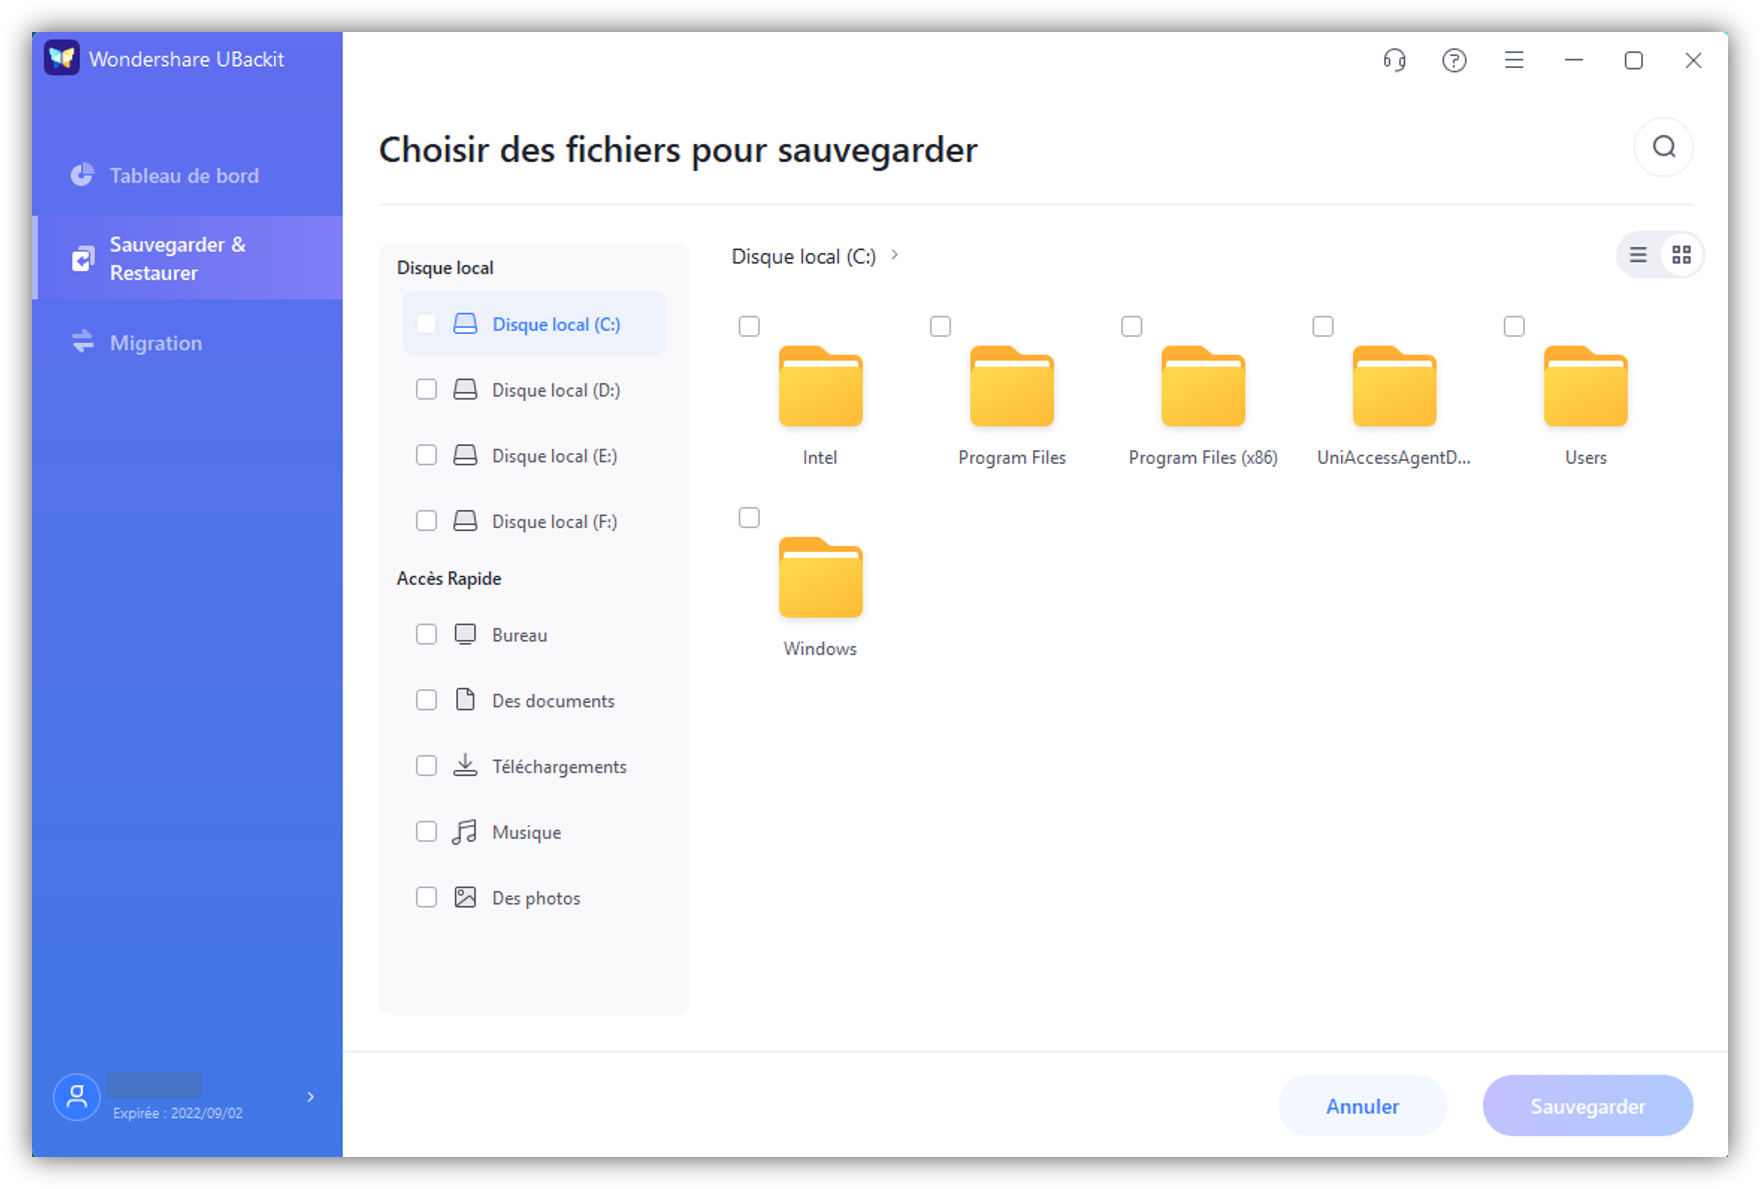
שלב 2: בחר את הנתונים שייכללו בגיבוי
עכשיו אתה יכול פשוט לבחור את הקבצים והתיקיות שברצונך לכלול בגיבוי Ubackit. אתה יכול לבחור כל מחיצה בסרגל הצד ולגלוש באחסון המערכת שלך כאן.
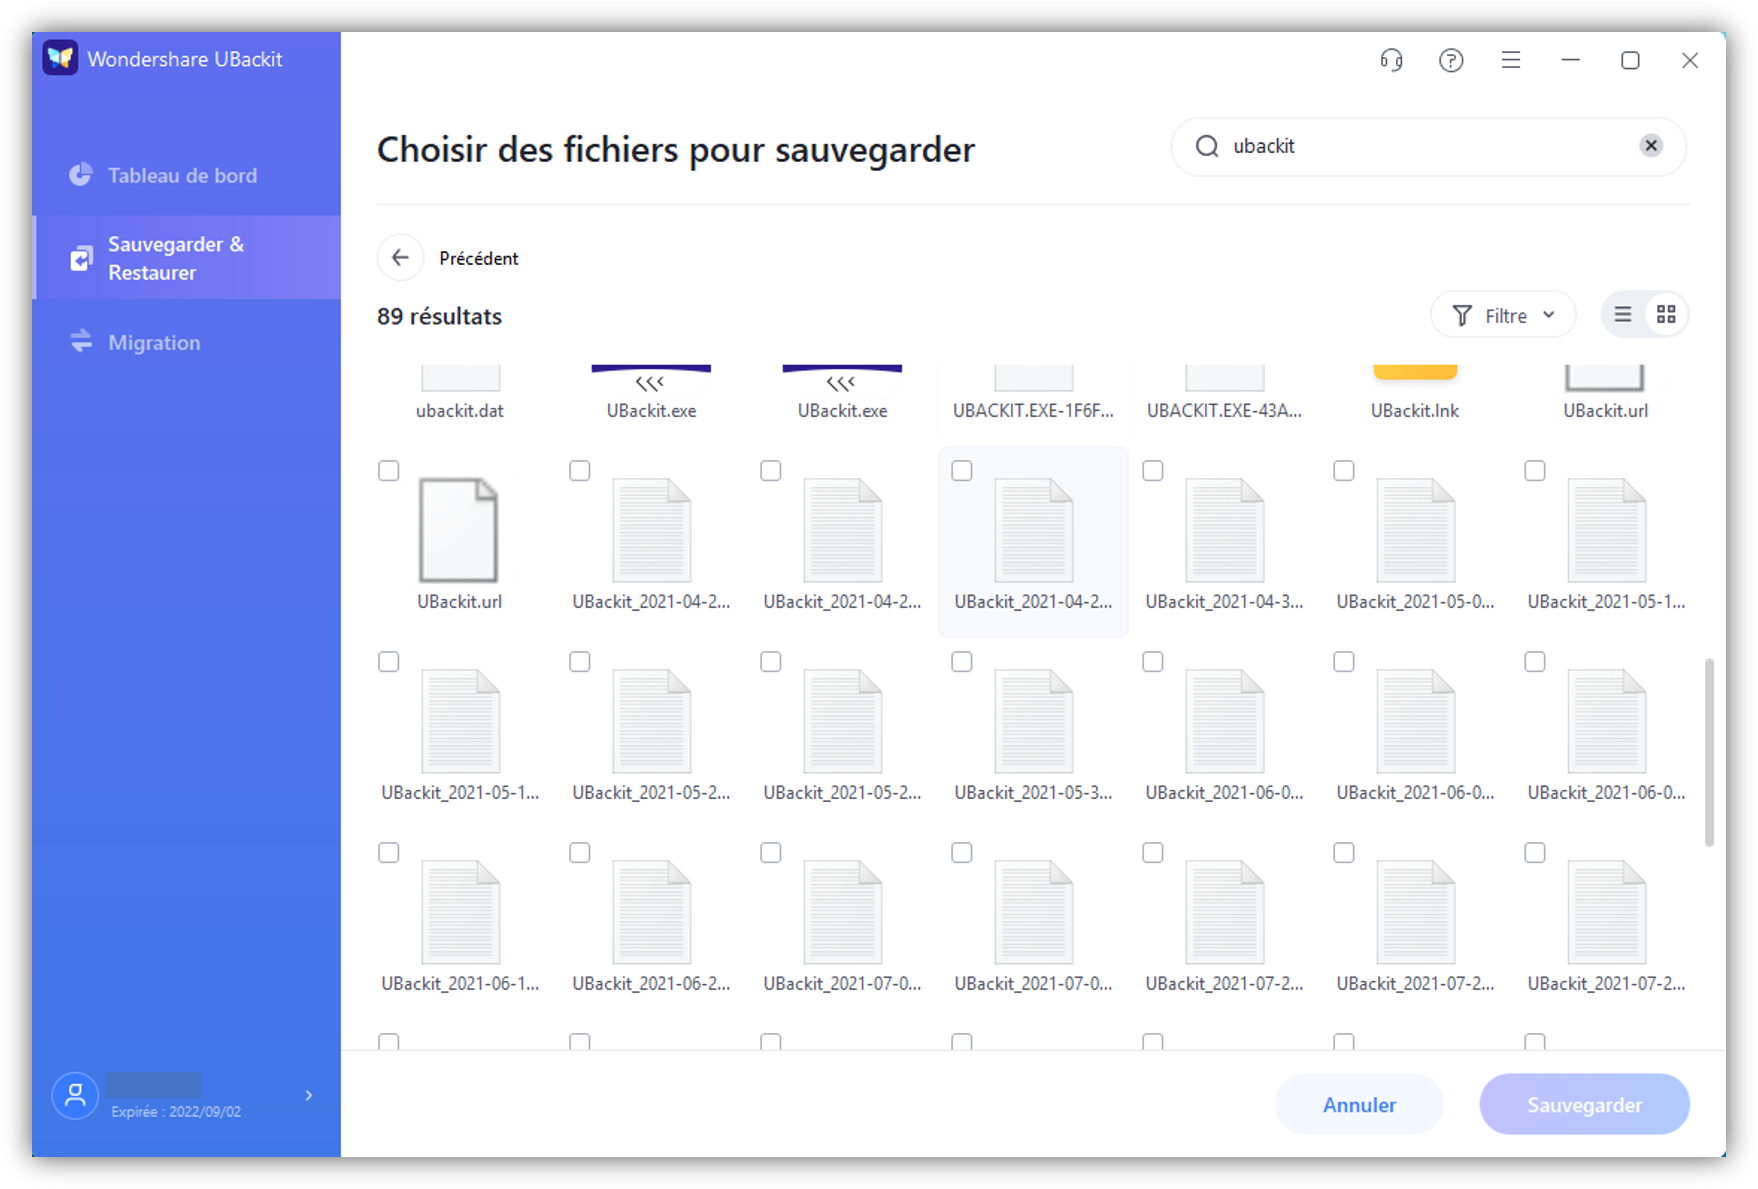
אם ברצונך לכלול קבצים ספציפיים בגיבוי, פשוט הזן מילות מפתח רלוונטיות בסרגל החיפוש (למעלה) כדי להשיג את התוצאות הרצויות.
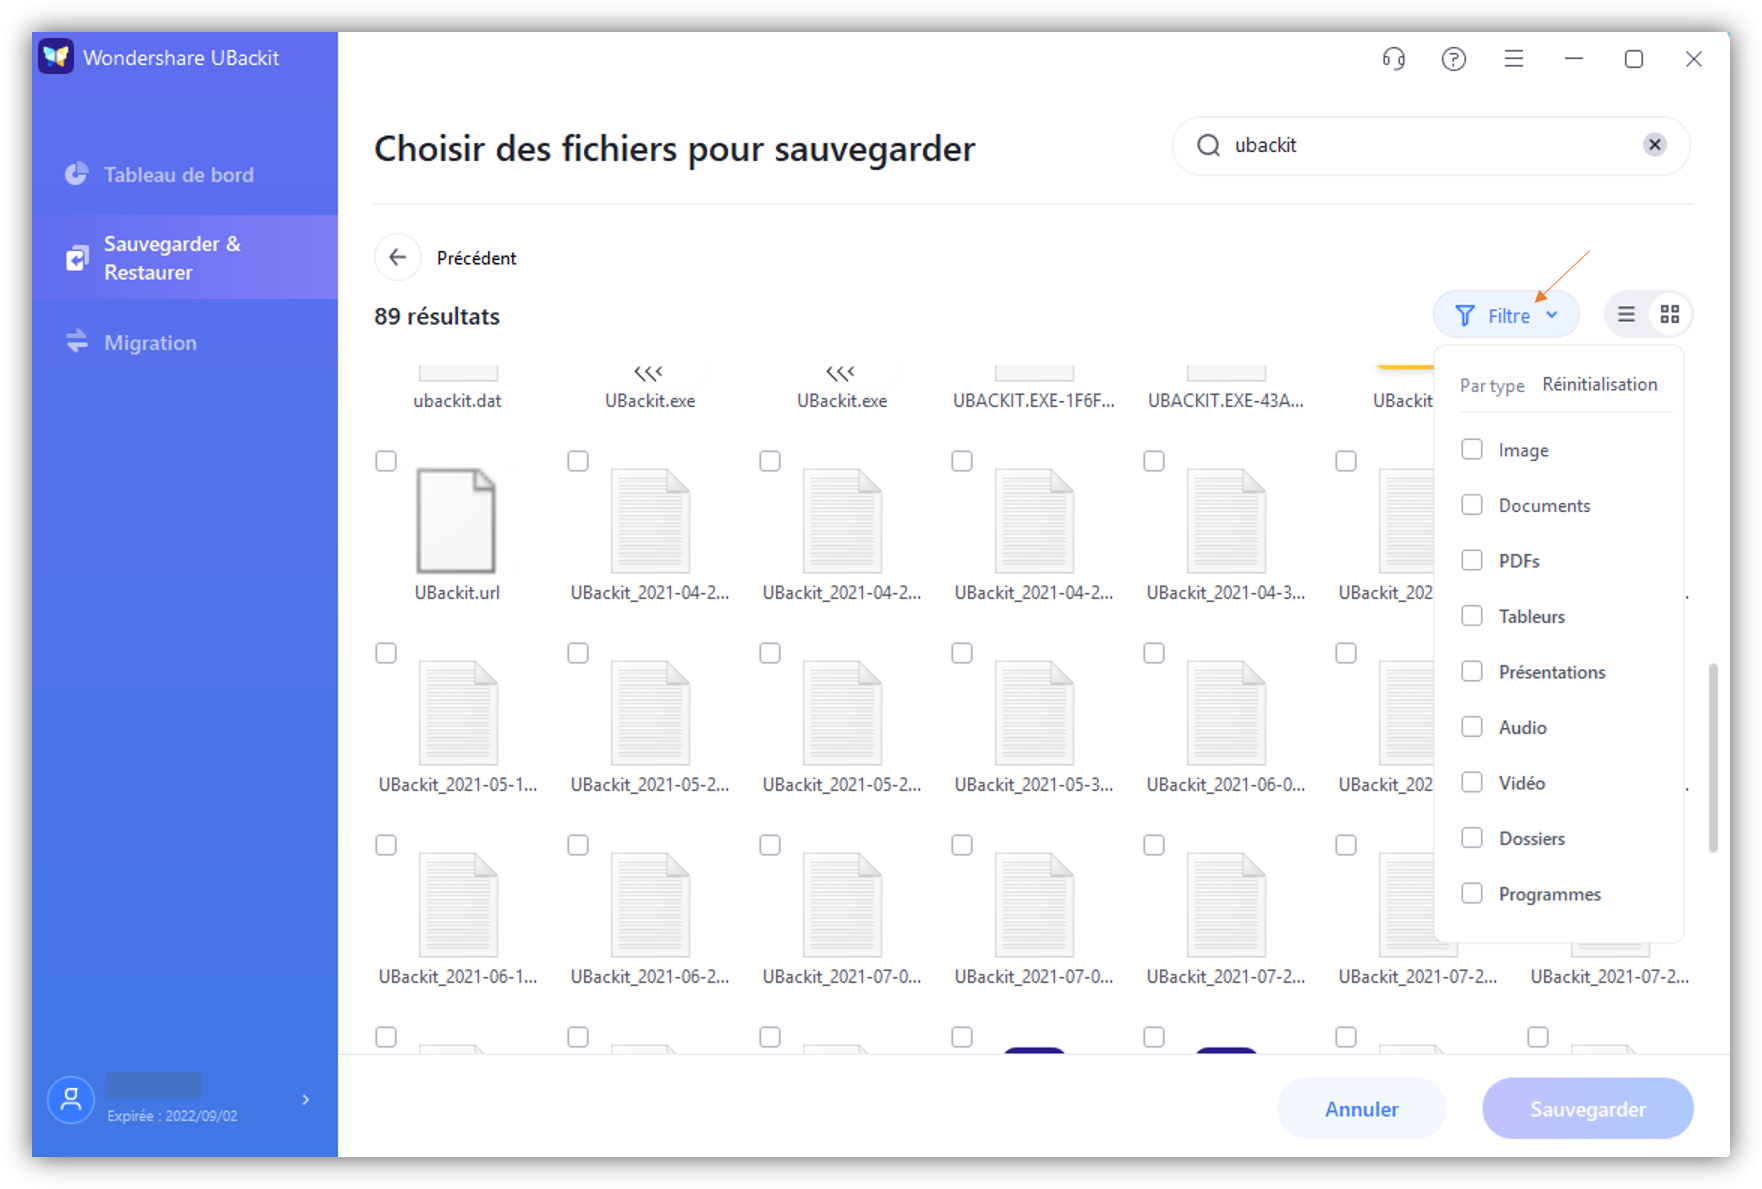
בנוסף, באפשרותך גם לגשת למסנן משולב בראש הדף אם ברצונך לגבות סוגי נתונים ספציפיים.
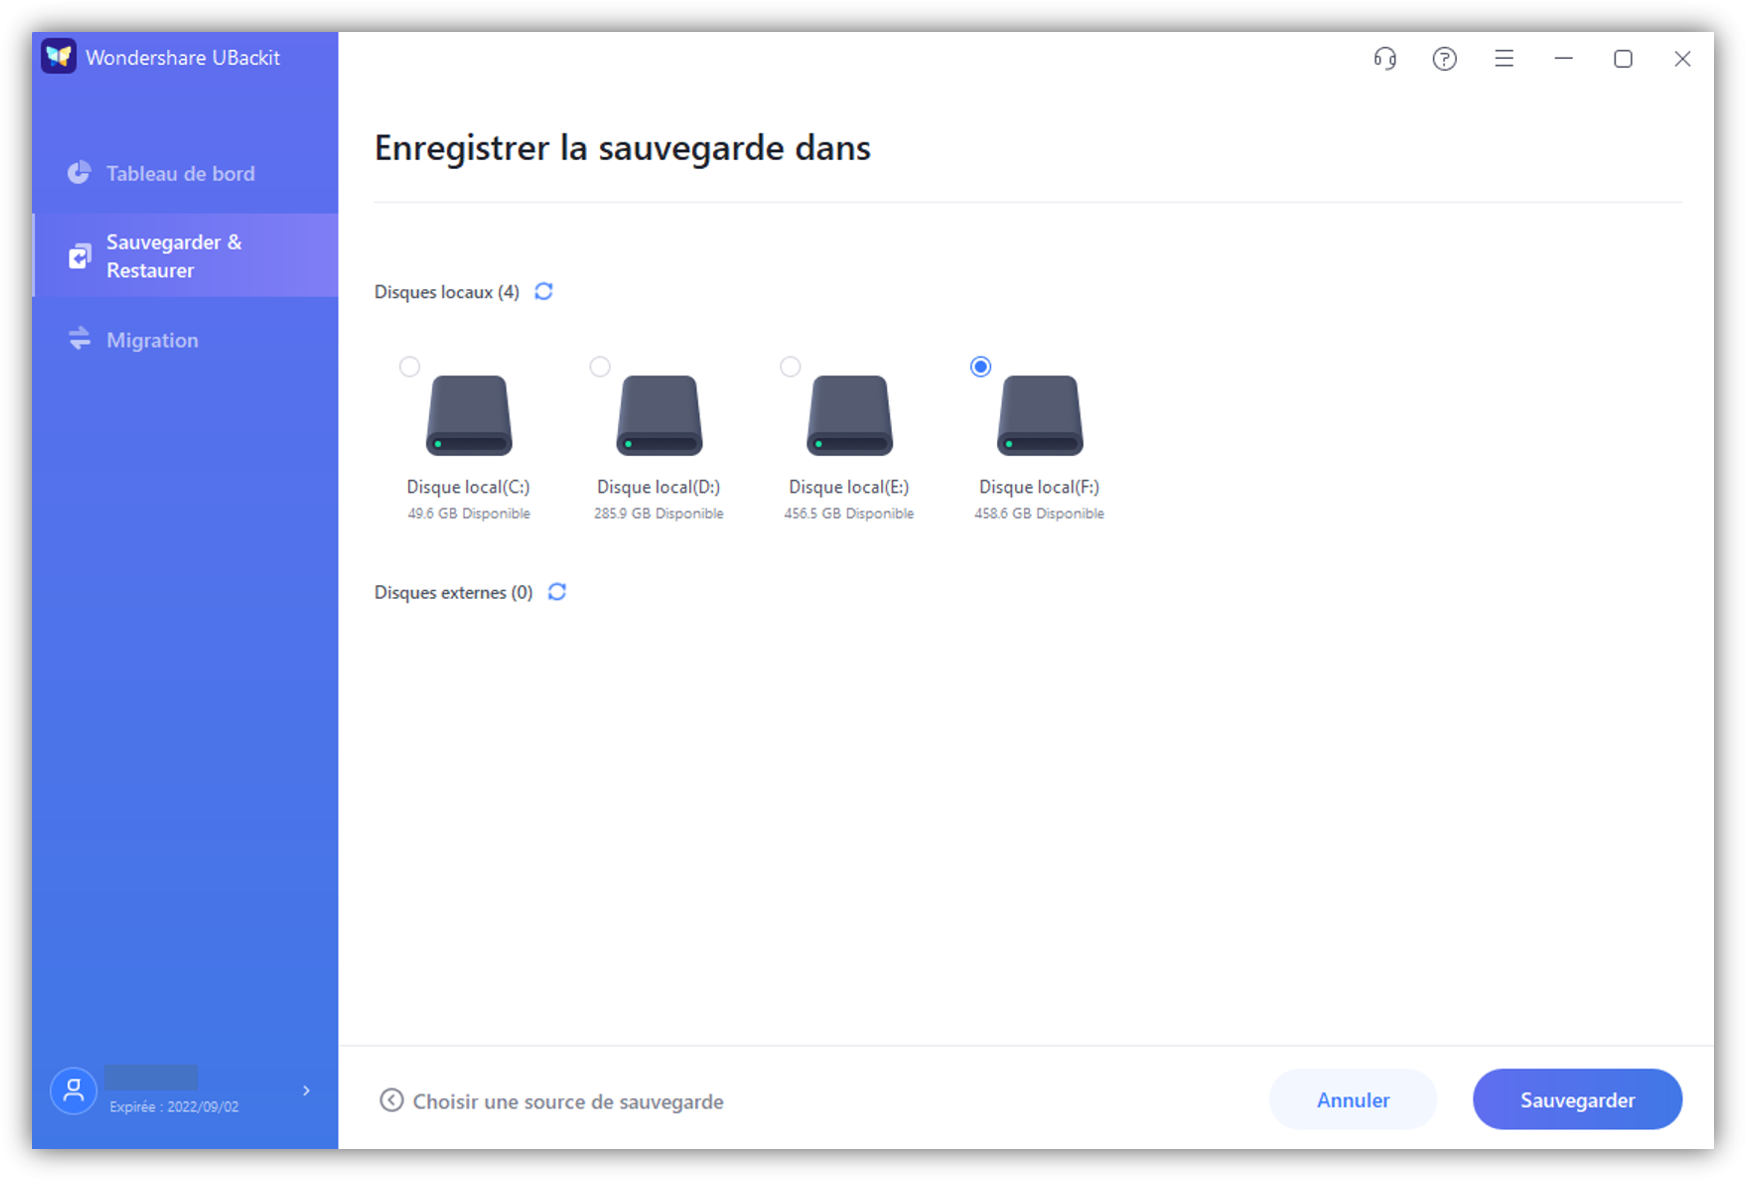
שלב 3: בחר יעד כדי לשמור את הגיבוי
לאחר שבחרת את קבצי הגיבוי, תוכל לבחור מיקום יעד. זה יכול להיות כל מחיצה פנימית של המערכת שלך או כל מקור אחר (כגון כרטיס SD או כונן קשיח חיצוני).
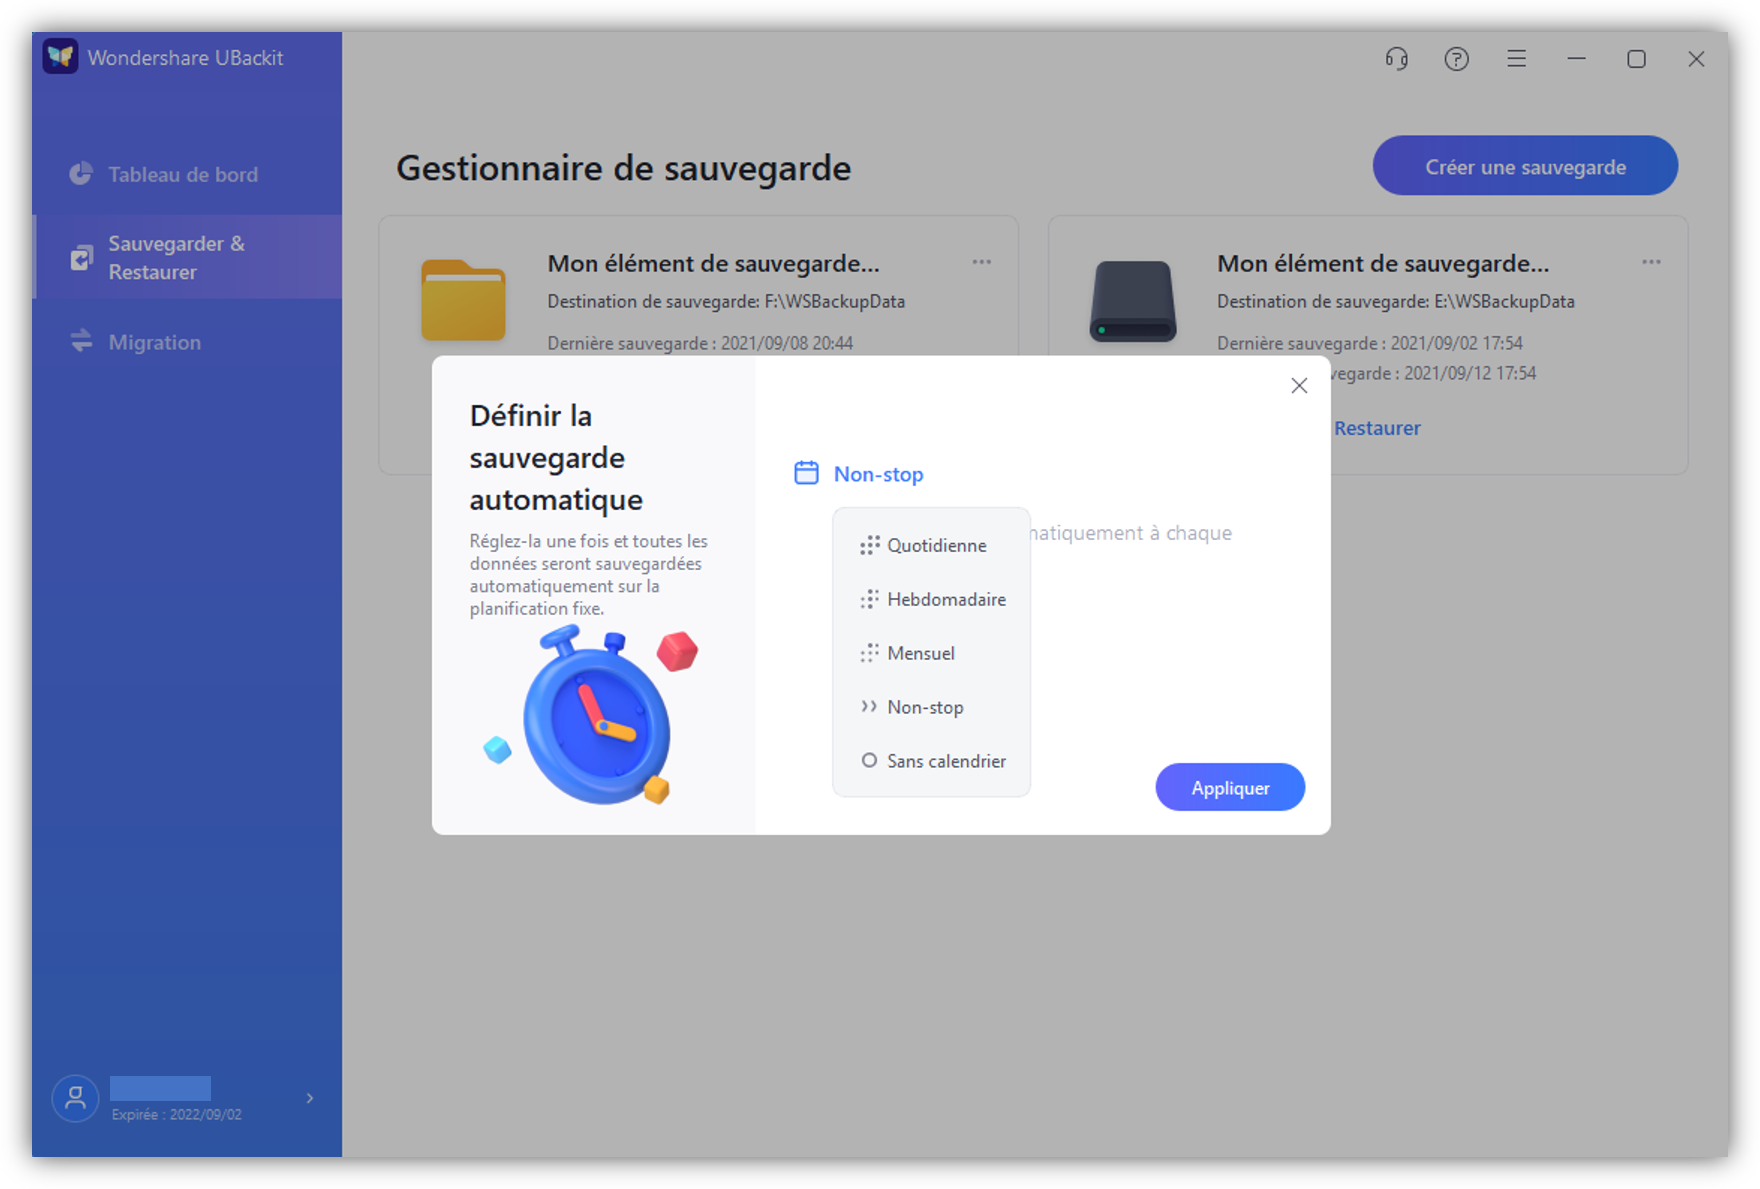
שלב 4: הגדר תוכנית גיבוי אוטומטית
כדי להקל על המשימה שלך, Ubackit תומך גם בפונקציית גיבוי אוטומטית שתוכל לגשת אליו מראש היישום. פשוט לחץ על האפשרות “הגדר גיבוי אוטומטי” והגדר לוח שנה לבחירתך (יומי, שבועי או חודשי).
שלב 5: סיים את תהליך הגיבוי
זה הכל! כעת תוכל ללחוץ על כפתור “הגיבוי” ולהמתין עד שהיישום ישמור על גיבוי ייעודי של הנתונים שלך. אתה יכול להציג את ההתקדמות מהממשק ולנסות לא לסגור את היישום בינתיים.
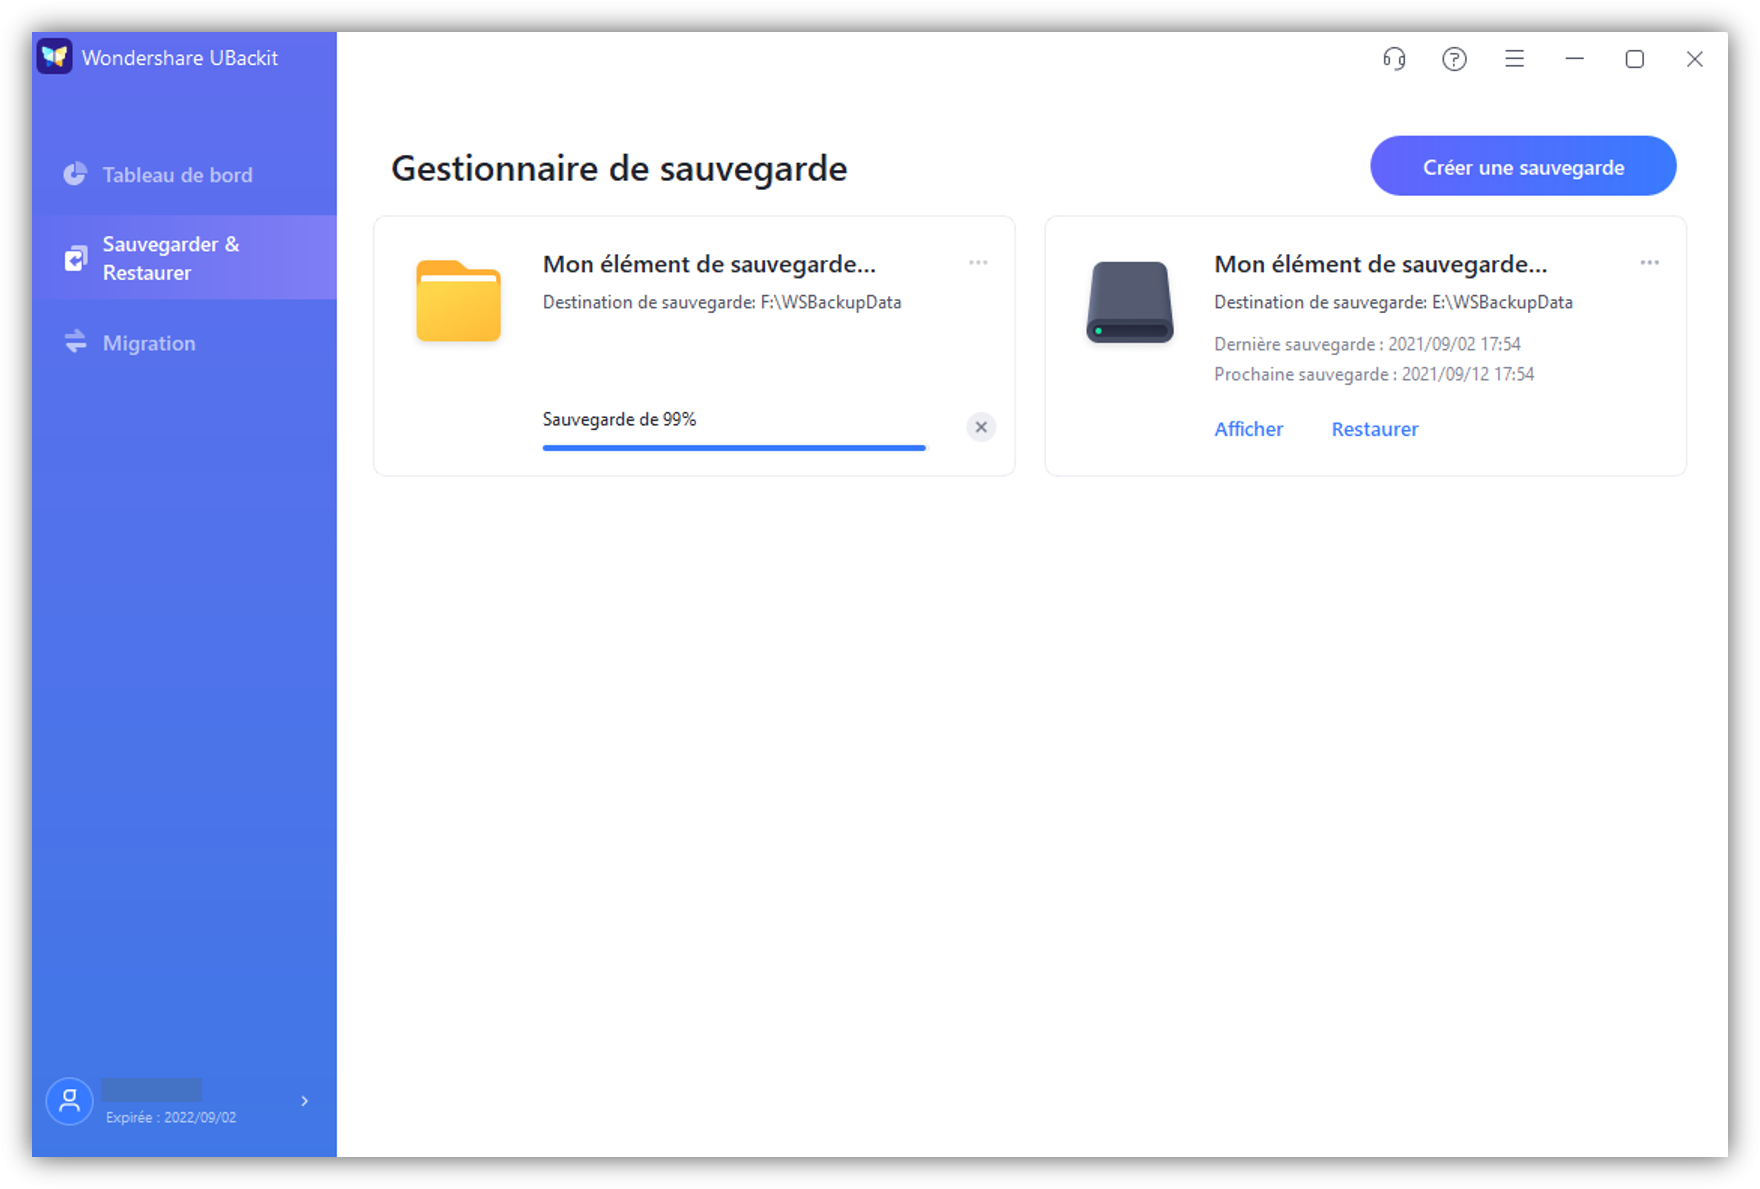
Ubackit תודיע לך אוטומטית על סוף התהליך כך שתוכל לנהל את הגיבוי שלך ואפילו להחזיר אותו לכל מקום אחר כך לאחר מכן.
אני בטוח שאחרי שקראתי את הפוסט הזה, תוכל להבין את ההבדל בין זרם קבצי כונן Google לגיבוי וסנכרון. מכיוון ששירותים אלה יכולים להיות מעט מסובכים ויקרים, אתה יכול לנסות כל אפשרות אחרת. לדוגמה, Wondershare Ubackit היא האלטרנטיבה הטובה והבמחורה ביותר לגיבוי וסנכרון של גוגל. הוא מצויד בטונות של תכונות מתקדמות ויאפשר לך לשמור או לשחזר את הנתונים שלך ומתי תרצה.
גיבוי
- שמור תוכניות ב- Windows
- העבירו קבצי תוכנית לדיסק אחר
- שמור קבצים בכונן קשיח חיצוני
- העבר נתוני דיסק C
- שמור נתונים בכונן הקשיח החיצוני Seagate
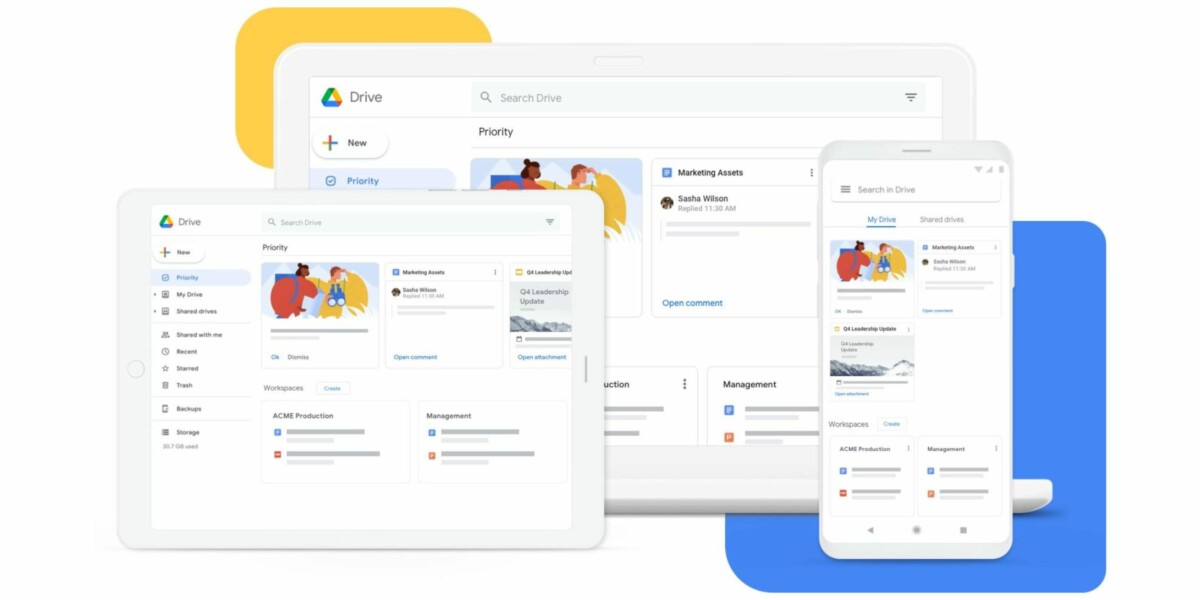
כונן Google לשולחן העבודה מגיע להחליף את הגיבוי והסנכרון, שהחליף את Google Drive
גוגל הודיעה על השקת אפליקציה חדשה עבור Google Drive במחשב האישי. עליו לאחד את כל החוויות המוצעות על ידי גוגל ולהחליף הזרמת קבצי כונן וגיבוי וסנכרון.
אנו זוכרים את זה היום, אבל גוגל לקח זמן רב להיכנס לשוק האחסון המקוון עם Google Drive. מתחרים כמו Dropbox ובאותה עת, מיקרוסופט סקיידרייב, היו כבר פופולריים כאשר לגוגל היה הרעיון להרחיב את סוויטת Google Docs שלה לאחסון וליצור Google Drive. מעיכוב זה, המשרד התקשה לימים לתקן את פיתרון הסנכרון שלו למחשבים.
לאחר שהציעה תוכנת סנכרון למוזיקה, תמונות וקבצים עם שלושה יישומים נפרדים, גוגל רצתה להביא את השניים האחרונים ביישום שנקרא Google Backup ו- Sync, וזה לא היה המעשי ביותר לשימוש.
לאחר החלפת Google Drive על ידי Google Backup ו- Sync, Google Today מודיעה על הגעת יישום חדש של Google Drive, שתחליף את Google Backup ותסנכרן.
יישום מאוחד לחלוטין
המטרה היא שהפעם לאחד שתי חוויות: זה של הציבור הרחב עם גיבוי וסנכרון, ושל חברות עם זרם קבצי Google Drive. בעידן העו”ם, אנשים רבים יכולים להתקין בשני הפתרונות במקביל במכונה שלהם, מה שמקשה על עבודת המחשב של החברה לקשה יותר. זו הסיבה שגוגל עכשיו מבקשת להפגיש בין שני הפתרונות, עד סוף השנה.
כדי לא למהר שום דבר, גוגל תמשיך בשלב. נכון להיום, יישום זרם הקבצים של Google Drive, זה של חברות, ידוע ב”גוגל דרייב לשולחן העבודה “. לאחר מכן צוותי המשרד יעדכנו לקוח זה בהדרגה כדי לתת לו את כל הפונקציות של גיבוי וסנכרון. לאחר סיום זה, הלקוחות של האחרונים יועברו לתוכנה החדשה.
גוגל פרסמה רשימה מלאה של תכונות כדי להשוות בין שני הפתרונות הנוכחיים שלה עם החדש. אתה יכול לקרוא שלא ניתן יהיה לבחור את הקבצים של Son Google Drive לסנכרון. מצד שני, לקהל הרחב תהיה כעת גישה לפיתרון הזרימה לאחסון מטא נתונים של קבצים בלבד באחסון מחשב, תוך כדי ההמתנה להורדת הקובץ המלא לפי דרישה. כבר לא ניתן יהיה להתעלם מתוספות קבצים מסוימות בעת סנכרון.
אם אתה מנהל סביבת עבודה של גוגל, גוגל מציעה טופס להירשם לגרסת בטא של היישום החדש.
האם אתה משתמש ב- Google News (חדשות בצרפת) ? אתה יכול לעקוב אחר המדיה המועדפת עליך. לעקוב אחר Frandroid בחדשות Google (ונומרמה).